You might have seen a warning like “Avoid Bad Request” in a web page testing tool like GTMetrix or Pingdom. This implies your web pages contain broken links.
Whenever your viewer clicks on a link with a bad request error, they are taken to a page written: “404 not found”. This bad request error causes a loss of audience trust as well as Google ranking. However, these broken links are awful for any site, and these can ruin your site’s user experience.
Therefore, it’s crucial to detect and fix these errors as soon as possible. Today, in this guide, I’ll discuss how to fix avoid bad requests in WordPress after detecting them. If you are ready to learn, then read on.
What’s A Bad Request?
According to Wikipedia, Bad request pimples when The server cannot or will not process the request due to an apparent client error. Such as malformed request syntax, size too large, invalid request message framing, or deceptive request routing.
As your website changes over time, it’s unavoidable that some of your resources will be moved and deleted. In that case, if you forget to update your frontend codes accordingly, the server will issue a “404 not found” or “410 gone” response. This means the file can’t be found anymore.
These are the wasted and unnecessary requests that lead your site to look unprofessional and impact the user experience. However, if these requests are related to resources like JS or CSS files that can block subsequent browser processing, they can virtually make your site crash.
How to Fix Avoid Bad Requests in WordPress?
Finding these broken links and rectifying the issues helps ensure that your visitors are being directed to the actual page with proper information. This thing also guarantees that your site has no wasted resources due to bad requests.
So, let’s find out how to fix avoid bad requests in WordPress-
1. Detecting the Bad Requests
You should scan your site for such links, and certain speed testing tools can identify if your website contains any bad requests. Apart from that, these tools will notify you which URLs require to be fixed. So, you can use the following tools to do this process-
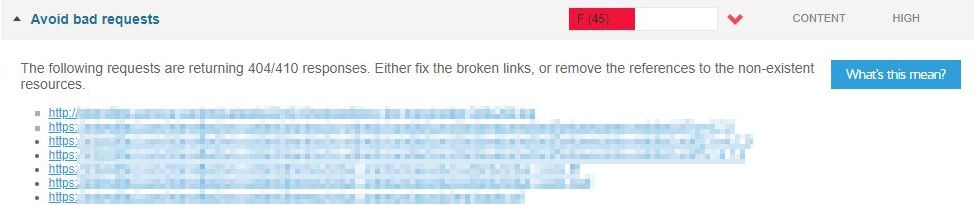
As you can see, this snapshot from GTMetrix shows, the URLs of resources produce several 404 and 410 errors, and this tool identifies them as bad requests.
Similarly, you can use Google Search Console to verify the broken links by navigating to crawl > crawl errors > URL errors. This tool will identify all the crawl errors of your site that the Google search bot experienced while trying to crawl your site.
2. Fixing Manually
It’s easy to fix these bad requests manually once you get the exact broken URLs. The page speed tools will provide you the exact URLs, as it’s clear from the above image. So, you just need to track down from which page this URL comes. And then you can change it with a new one or remove it permanently.
If you find one or more bad requests, just remove the unnecessary code that’s calling the resources and provide them with the missing resources. That’s all; you won’t need to go for any coding to do that.
3. Using WordPress Plugin
If you are not comfortable with the manual work, don’t worry; there is a simple solution to it. A plugin makes it easier for you to effectively clean up these broken links without requiring any space for guesswork.
You can use the Broken Link Checker plugin. Simply install it from your WordPress dashboard just like the other plugins and activate it. Once the installation and activation process is done, it will scan your pages and compile the list of broken links. You will find these files on your WordPress admin dashboard under Tools > Broken links.
The best part is, this plugin shows the exact source where the file is linked. By simply clicking the source, you can go straight to the problem page and fix this issue.
4. WordPress Redirection
If you’re getting side-wise errors, then the issue may be with your permalinks. So, to fix this issue, head to your WordPress dashboard, navigate to Settings > Permalinks, and update your settings. Once you’re done with the settings, click on save changes.
Still, if you see pages returning 404 errors, you’ll require setting up a 301 redirect for them. The easiest way to make this done is by using the Redirection Plugin. So, install and activate it, and then go to Tools > Redirection.
Give answers to a few quick questions to set up the tool, then go for redirecting the URL to your WordPress site.
Just like the above image, enter the source URL you want to redirect and the URL you want to redirect the page to, the target URL field. Click Add Redirect, and you’re good to go.
Conclusion
Lots of bad requests around your WordPress site are an indication of a poorly optimized site with poor user experience. Simply put yourself in your audience’s place, and think how you’ll feel when a site takes you to a 404 error page. You’ll immediately abandon this site, right?
Exactly, this will be the situation of your site also. But if you fix this Bad Request issue, your visitors, as well as Google, will be happy, speed score will improve, and ranking will be better.
I’ve shared how to fix avoid bad requests in WordPress in this guide. You can try them on your own, and if you feel complicated, you can hire an SEO professional. They can handle this much better in a professional way.
So, if you liked this guide, don’t forget to share your thoughts. Also, you can Contact Us for any sort of queries.

